This Vacuum Sealer buyer’s guide takes approximately 40 minutes to read in its entirety. Be sure to use the table of contents below if you are short on time. You’ll learn all about the best food vacuum sealer and vacuum sealer features in general. Completing this guide will make you into a vacuum sealer wizard.
Lookit’ that wizard. That’ll be you when you’ve done this guide. Yeah!
Vacuum Sealers are used to preserve food while maintaining flavor, appearance, and freshness. I know that everyone has varying needs, but I feel I have successfully narrowed the selection down to the best food vacuum sealer and a few other great models that will ensure that you are satisfied with your purchase. If you know your way around a vacuum sealer already and just want to read about the best food vacuum sealer then skip ahead in the vacuum sealer buyer’s guide. If you are new to vacuum sealing read on below to learn more about available features, different types of vacuum sealers, maintenance, my top picks, and then finally some tips and tricks that will help you save even more money.
Considerations in choosing a Vacuum Sealer
One of the main considerations you should take into account when deciding on purchasing a food vacuum sealer is space. Do you have the room on your countertop for the unit? Will it sit out on the counter all of the time or will you store it in a cabinet, closet, or perhaps your garage? What about all of the food that you vacuum seal? Do you have enough room in your pantry or your freezer? Don’t forget about all of the supplies that go along with it! Consider what is best for you.
Your second biggest consideration is the frequency of use. How often are you going to use the vacuum sealer? In particular, when you do use it how many consecutive seals will you need to do? How much time are you able or willing to spend actually performing the task?
Equally important, You can expect that most vacuum sealers will be fairly loud. I would say that they are nearly as loud as a handheld vacuum cleaner. Keep that in mind.
Vacuum Sealer Types
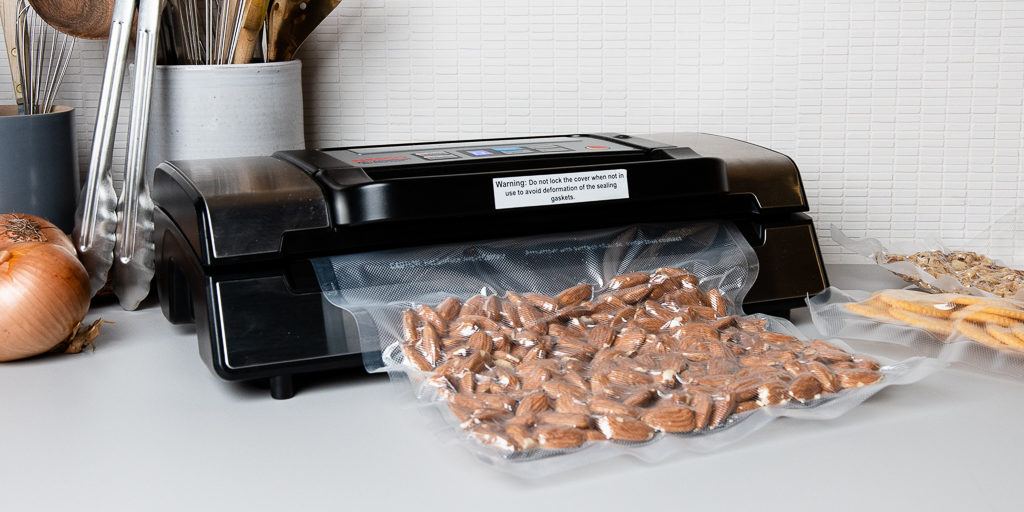
There are two main types of food vacuum sealer. There are chamber sealers and out of chamber sealers. This describes where the food and the pouch are located in relation to the machine. With a chamber machine the pouch and its contents are shut into the chamber of the machine where the air is evacuated entirely. This makes it possible to seal liquids and other moist foods because the pressure is equalized on all sides and does not draw the contents up towards the mouth of the bag. Here is the Chamber Sealer buyer’s guide.
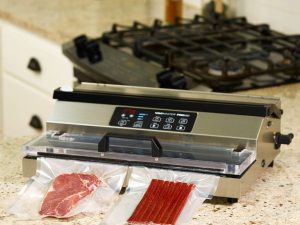
An out of chamber machine has the pouch and contents external to the machine. The only part of the bag that is enclosed in the vacuum sealer is the mouth of the bag, which is placed into the vacuum channel where it evacuates the air. Liquid tends to be drawn out of the bag this way due to the pressure from the atmosphere and the suction, which can cause a bad seal. There are also small handheld vacuum sealers, which fall under the out of chamber category. Out of chamber sealers are less expensive than chamber sealers.
Average size and weight
On average you can expect an out of chamber vacuum sealer to be somewhat large, in the neighborhood of 6″ wide by 16″ long by 4″ high on the smaller side and 15″ wide by 23″ long by 9″ high on the larger side for an out of chamber sealer. They will weigh around 4 lbs at the lightest to around 20 lbs at the heavier side. They are easy to store on the counter or to tuck away in a cabinet.
For a chamber sealer you can expect on average much larger sizes ranging from 12″ wide x 19″ long x 14″ high to 13″ wide by 28″ long x 20″ high. A chamber sealer will also be much heavier, from around 57 lbs to 80+ lbs. These machines are more or less permanent appliances. You will want to find a place for it that is convenient to work with. Preferably one that is close to your food. Many people put their chamber sealer on carts to give them some mobility.
General Features:
Beyond evacuating air and melting plastic together to form a seal, a vacuum sealer can have additional features that may or may not be useful for you. The most important additional feature that you should look for is an accessory port. This will expand the functionality of your vacuum sealer dramatically. You will find uses for it beyond food as well.
Undoubtedly, each manufacturer suggests that you use their brand of roll material or bags. Really, any bag designed for a vacuum sealer that has the textured air channels will work. These channels allow the air to be completely removed efficiently. The major thing you want to pay attention to concerning bags is the thickness of the plastic.
A list of Additional important features:
- One touch vacuum and seal operation: You should be able to feed the pouch into the suction channel, close the unit and then press a single button for the machine to go through a complete evacuation and seal cycle. Some machines are fully automatic and will grab the pouch, pull it into the machine, remove the air, then seal all with the push of a button.
- Interruptable: You should be able to interrupt the operation and have the machine begin to seal before the air is completely removed from the pouch. This is especially helpful for delicate food items like baked goods that you do not want to be crushed.
- Manual controls: You should be able to press a button to make the machine go through additional vacuum cycles. Additionally you should be able to press a button to have the machine seal a bag without removing any air at all. Sealing without removing any air is especially useful for resealing food, like bags of chips or pouches of cheese for example.
Less important features (but some are nice to have):
- Moist / Dry mode: A mode for moist food like juicy steaks and fine powdery dry food like flour. The air is evacuated from the bag or pouch at a slower rate to avoid intake of the moisture or food particles.
- Removable drip tray: A tray to collect any moisture that might get sucked out of the pouch. This helps keep it out of the vacuum chamber.
- On board roll storage: A place to mount a roll of plastic. It allows you to easily cut pouches to any length for vacuum sealing food or items in. Rolls are typically 9″ or 11″ wide by 25′. Most machines will not fit the 50′ rolls on board, but that does not mean that you can’t use them. You just need to wait until the roll is short enough to fit in the machine.
- On board automatic or manual cutter: A track mounted cutter to make cutting your pouch straight easier. Makes scissors optional.
- Automatic roll winding/rewinding: Press a button to feed or rewind the roll. This is not a feature that would sway my purchasing decision. I don’t like extra parts that can and do break.
- Power cord storage: A place to stow the power cord. You’ll never realize how convenient this is until you have a machine with this feature.
- Pulse Mode: A button that will activate the suction for as long as you have the button pressed. This gives you fine control.
- Fully automatic operation: The machine senses when a pouch is inserted and grabs onto it, removes the air and seals. Conceptually it sounds great, but in practice it is actually finicky and takes more time than manually operated machines. I like the finer control you are given when using a manual machine and will always pass on a fully automatic version. There are fewer things to break on a manual machine. Fully automatic machines are generally larger as well.
Maintenance, durability, and serviceability:
Since it is a kitchen appliance inevitably you will get the machine messy. If it has a drip tray, is it removable? How easy is it to clean? Can you easily get liquids out of the vacuum chamber if any gets in there?
Most people I know are most concerned with how long their machine will last. If it breaks, can you fix it? How easy to obtain are replacement parts? Or do you just toss it into the trash and buy another one? For example, you are only able to buy gaskets and Teflon tape for FoodSaver/Seal-A-Meal machines. With Weston and Vacmaster machines you can replace many parts.
Best Food Vacuum Sealer:
I have seen most other blogs state that the FoodSaver V2244 is the best food vacuum sealer, and even though it remains the #1 best seller on Amazon in the Vacuum Sealer category I have to disagree. By now, it is an older model and FoodSaver has released an updated version called the FM Series. The FM2000 is a direct evolution of the V2244 and does everything the older model does with the added bonus that it utilizes 40% less bag material than older models. As of writing this, the Fm2000 is $6 cheaper than the V2244. It really is a no brainer to purchase the newer model over the old.
However, in my opinion the FM2000 is still not the best food vacuum sealer. To me, the added features of the FM2100 make it the best food vacuum sealer. The included on board roll storage and roll cutter make it the best. It also has a moist/dry mode and is very reasonably priced.
Some of the only downsides is the short power cord, lack of replacement parts and poor quality control.
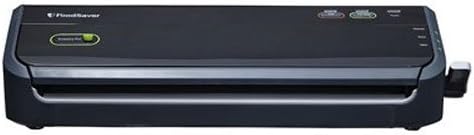
FoodSaver FM2000. Get this model if you don’t have a lot of counter or storage space.
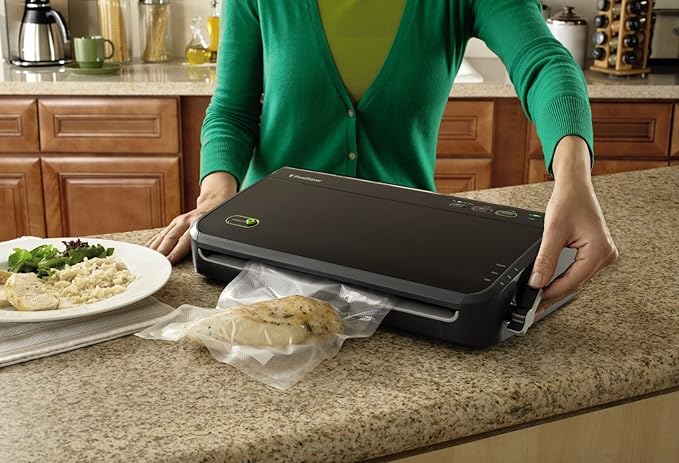
FoodSaver FM2100. The Best Food Vacuum Sealer. Get this if you can afford the counter and storage space!
Despite my reservations about the FoodSaver brand not having many available replacement parts I still chose the FoodSaver FM2100 as the best food vacuum sealer because of their support. You can tell that they care about their brand because they take the time to reply to questions and reviews on Amazon. Other brands are noticeably silent. You can also easily reach someone on the phone or through chat on their website.
Details on the FoodSaver FM2100
- Size: 13.3 inches deep x 17.8 inches long x 5.9 inches tall.
- Weight: 7.5 lbs
- Rating: 4.5 out of 5 stars, well reviewed.
- Price: $92.76 (MSRP of $119.00) and free shipping.
- 5 Year Limited Warranty.
- 110-120 Volt, 60 Hz, 120 watts, 1 Amp. Not rated for 220V conversion.
- Removable drip tray. Dishwasher safe.
- Takes 8″, 9″ and 11″ rolls.
- Seal thickness is roughly 3/8 of an inch.
- Moist/Dry Food Settings.
- Press the Vac / Seal button to begin the air removal and sealing process. You can stop the vacuum process at any time and seal the pouch to prevent delicate items from being crushed by pressing the seal button.
- Accessory Port: It will work with the FoodSaver FAX12 AND the FoodSaver FA2000 model accessory hose. Note that the FoodSaver FA2000 accessory hose will only work with the FoodSaver FM2000 and FoodSaver Fm2100. The hose is included.
- Onboard cord storage.
- Can stand on its back or side for storing.
- Can seal other bags like chip bags and mylar bags, but will not remove the air.
- Will do around 15-30 seals consecutively before it needs a 20 minute break.
- It takes approximately 40 seconds to complete a vacuum and seal cycle.
- Requires about 20 seconds between each operation. This sounds like a lot of time but it is actually trivial since it takes about that much time to prepare your next bag.
- Sturdier build quality than the V2244.
More specifics on the best food vacuum sealer:
- The sealing strip reaches approximately 250 degrees Fahrenheit when in use.
- Suction rating is between 18 and 22 inches of mercury (inHG).
- Won’t fit a 50′ roll until you use some of it to reduce the size.
- Made in China.
- Comes in two colors: black and white.
- Box contents: 3-Quart Bags, 2-Gallon Bags, 1-11″ x 10′ Roll, Food Vacuum Sealer and Accessory Hose.
- The sealer has a short cord. Be prepared to use an extension cord to make room or use the sealer near an outlet.
- Easy to understand instruction manual.
The second best food vacuum sealer, but only by a margin:
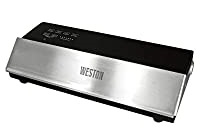
It was a close call between the FoodSaver Fm2100 and the Weston 65-0501-w. In the end the FoodSaver FM2100 won out as the best over the Weston only due to price. The build quality coupled with readily available parts made the decision very difficult for me. I wanted to say it was the best. The Weston’s might not have a drip tray like the FoodSaver, but the FoodSaver does not have a built in cooling fan or heavy duty motors. Those two features make the Weston 65-0501-W an absolute work horse. I dare say you could use it all day without having to wait for it to cool off like the FoodSaver FM2100 would after about 10 to 15 seals. I really hesitate to call it the second best, so I think I will call it the best food vacuum sealer for a person with a higher budget.
There are only two bad things about this machine; one being the price compared to a FoodSaver machine and two; the fact that you have to push down with about 10 lbs of force on each side of the machine in order to close it. That’s it.
Details on the Weston 65-0501-W:
- Size: 18 inches x 10 inches x 6 inches
- Weight: 7.3 lbs
- Rating: 4.1 out of 5
- Price: $151.95 ($199.99 msrp)
- 1 year warranty: Only applies if you register within 30 days of purchase.
- 110 Volt, 60 Hz, 210 Watts
- Accessory port which is compatible with the FoodSaver brand accessory hose and accessories.Weston also makes their own canisters that come with an an accessory hose.
- Angled vacuum chamber which makes drip trays largely unnecessary.
- Wider sealing strip verses the FoodSaver brand
- 20 second wait time between seals, which is insignificant
- 12 inch sealing strip
- 23″ inHG (inches of mercury) suction strength.
- Automatic, manual (pulse) and seal buttons and dedicated marinate modes.
More specifics:
- Contents of the box: Food Vacuum Sealer, instruction manual, and fifteen 8″ x 12″ quart bags.
- It is louder than any FoodSavers due to the more powerful motor.
- It sucks out a little bit more after you hit the “seal” button, so if you get your liquid right up near the top and then hit “seal”, it often will suck a little bit more and get liquid in the seal or in the chamber beyond.
- Tends to suck out a lot of moisture from foods when the “automatic” button is pressed.
- Deals well with small wrinkles on the edge of pouches as the strength of the vacuum tends to smooth it out.
- Made in China.
If you have an unlimited budget:
If you have an unlimited budget, I would actually suggest that you invest in a Chamber Sealer. If you have limited kitchen and or counter space and can’t store it on a cart, then the next best thing is the ARY VacMaster Pro 380. This is a serious machine. This machine is the best of the best, and it is more than most people will need for home use. It also carries a price tag of the best of the best. If you want to spoil yourself, buy the Vacmaster Pro 380.
What makes the ARY VacMaster Pro 380 the best of the best?
- A crazy big seal bar, it is 16″ wide!
- 5mm wide seals, which is larger than FoodSaver seals.
- Adjustable seal time from .5 seconds to 6 seconds.
- Built in roll storage and roll cutter
- Continuous operation. No waiting for it to cool down.
- Vacuum strength of 25 inHG
- Accessory port that is compatible with FoodSaver brand accessories.
- Built to last
- Replacement parts available with responsive customer service.
Are there any drawbacks to the ARY VacMaster Pro 380?
Yes, unfortunately it seems there are no things that are perfect. The biggest drawback to this machine is that you sometimes have to hold the lid down during operation. There is no lid lock. It also weighs about 25 lbs. There is also a plastic tab on the lid that tends to break during shipping. If you buy this machine and you get an E02 error click here for instructions on how to fix it (coming soon).
Must have Accessories for your Vacuum Sealer:
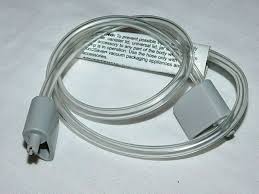
- Accessory Hose: The accessory hose is what you plug into the accessory port on the machine. It allows you to use all of the other accessories. This is a must have, you’ll want to buy one for certain.
The FoodSaver FA2000 is the accessory hose for the best food vacuum sealer, the FoodSaver FM2100. It isn’t compatible with any other machines Besides the FoodSaver FM2100 and Fm2000. The hose comes with the machine if you get the FA2000 bundle version. If not, you will get the regular FAX12 accessory hose. Either way, an accessory hose comes in the box with the Fm2100 and FM2000.
If you end up purchasing another model sealer then you will want to pick up the FoodSaver Fax12 accessory hose. It will fit pretty much any machine out there. (Including the FoodSaver Fm2100, and The Weston 65-0501-W) The accessory hose is a must have.
USE THESE IN ADDITION TO THE ACCESSORY HOSE:
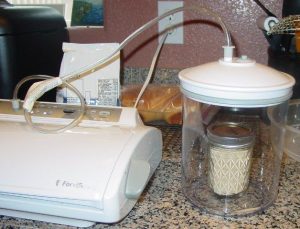
- Jar sealers: These are for sealing Mason jars. Once you have used a Mason Jar to can with, you can’t use it for that purpose again. Though, you can still use the jar for short term storage. With a vacuum sealer you can extend short term storage quite a bit.
Warning: Don’t mistake this process for preserving, as it does not actually kill microbes nor reverse the deterioration of food. It only deters them from growing and spreading.
This is another must have accessory. If you are going to buy a vacuum sealer, you need to buy these FoodSaver Jar sealers too. Attach the accessory hose to the top of the sealer, place a lid without the ring on top of the jar and then put the sealer over top of it. Press the button, after it is done remove the sealer and screw on the retaining ring.
Other nice to have Accessories:
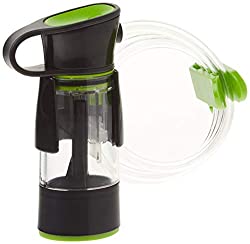
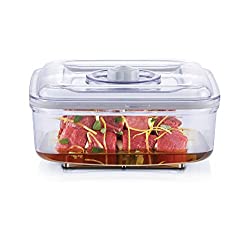
- Marinator: Forgot the meaning of free time? Or are you forgetful like me? You can accomplish in as little as 12 minutes as what would normally take hours. Gone are the days of waiting and having to plan ahead. Click here to buy a FoodSaver marinator. Enjoy life, be spontaneous.
The FoodSaver marinator can be used for storage as well!
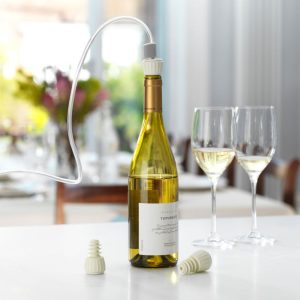
- Bottle stoppers: These work extremely well for wine and for infused oils and vinegar. If you enjoy wine, definitely pick up a set of FoodSaver bottle stoppers. They allow you to remove the air from within the bottle. They are inexpensive, they make a noticeable difference in the quality of your wine.
- Oxygen Absorbers: Your first thought might be that these are almost redundant, but hang with me here for a moment. Use Oxygen Absorbers when you want to seal food and store it for an especially long time. These are ideal for dry goods and are completely non-toxic. Toss one of these in your container or pouch and it will help maintain the vacuum seal. Again, this is the best procedure for goods that you will be storing for a long, long time. Note that once you open these you have to seal them in a vacuum sealed bag to keep them fresh.

Tips and tricks. You can save even more money!
Vegetables:
- Sealing Vegetables: When sealing vegetables, never store them raw. The best practice is to always blanch them first. Blanching vegetables will keep them bright and crisp by stopping the naturally occurring enzymes from making them grow and ripen further. Freezing alone slows down the action of the enzymes, but does not stop them. Blanching and freezing all but stops the enzymes completely. Here is a great resource about Blanching if you are curious!
In brief, to Blanche a vegetable you do the following:
1. Boil water, add some salt (optional)
2. Add your vegetables in small batches to maintain the rolling boil
3. Wait about 2 to 5 minutes depending on the vegetable. Leafy greens will need much less time than a potato would.
4. Quickly remove the vegetables from the water and dunk in an ice bath to stop them from cooking further.
5.Do not vacuum seal fresh cruciferous vegetables, garlic, soft cheeses, mushrooms, or onion. They produce gases which will cause the sealed package to expand and your food to spoil.
Meat:
- Be sure to add a healthy amount of oil into the pouch in addition to your spices and or herbs if you are going to sous vide. It will help your meat retain its natural shape and flavor (it helps resist the wrinkle imprints on the meat from creases in the vacuum bag).
- Because meat can be juicy, add a folded up paper towel into the pouch so it can absorb the liquids before it can possibly interfere with the seal.
- Another way to prevent meat from having imprints from the bag after sealing, freeze the meat first for a few hours then vacuum seal.
Misc relevant tips for preparing pouches:
- A simple trick to save some bag material: Instead of letting the bag hang out of the machine, support it from underneath with a book or object to make the pouch level with the machine. You won’t need to insert as much bag material into the machine this way.
- If you ever have trouble sealing a bag: Try cleaning the top of the bag where it sits in the machine with a clean, hot towel.
- To preserve foods safely: You can significantly reduce the growth of of microorganisms at temperatures of 40° Fahrenheit or below. Freezing at 0° Fahrenheit does not kill microorganisms, just stops them from growing. For long-term storage, always freeze food or use a canning method.
- Cool before sealing: Never vacuum seal food that you have just cooked. Let it cool down first. Put the food in the bag, then put the unsealed bag into the refrigerator until cold all the way through. Curious as to why? It is because reducing atmospheric pressure brings the boiling point of water down. Vacuum sealing reduces the atmospheric pressure in the bag down to pretty much zero since there is no more air in the bag, which means that water will boil at room temperature. If the food in the bag is moist, warm or hot when vacuum sealed some of the liquid will boil off inside of the bag and it will swell. Which completely negates the point of sealing in the first place. For this reason, I suggest freezing chicken or any other moist foods first since you don’t want any of the moisture escaping during the vacuum sealing process.
Money saving Tricks!
- Thought you couldn’t use a regular Ziplock style bag? Think again! The below video shows you how to reliably remove the air from a ziplock style bag by using the zip as a channel to remove the air from the bag. Genius! I do suggest double sealing to ensure it is closed well enough. Don’t use this method to store things for a long time, I would only do this for short term storage of a month or less and wouldn’t freeze them. Video Credit: BigFun4Us
- If you don’t want to use bits of vacuum seal bags to aide in sealing smooth bags, here’s a video demonstrating a DIY tool to aide in removing air from non-textured bags. This is a video showing him using it with Mylar! Notice he is using a Weston brand food vacuum sealer, the Weston Pro-2300. The tool is made from a camping cutting board. Most importantly he cut it down and then notched it in a grid pattern similar to the pattern on the vacuum seal bags using a hot implement like a soldering iron or wood burner. Honestly, a hot knife or an x-acto knife would do the trick too. This is the best trick in my opinion as it is reusable, saves bag material and gives a long lasting seal. Truly, the best of all aspects.
- You can use a hot iron to create a much thicker heat seal if desired.
- For free bags, you can even use those produce bags that you get from the grocery stores (The ones you normally throw away). All you need to do is place the food inside of the produce bag and twist it somewhat tightly. Trim the excess bag away, leaving a few inches of twisted plastic behind. Next, Place the twisted plastic bag into a textured vacuum sealer bag and make sure the twisted portion of the bag is tilted at an angle so it gets into the vacuum channel. Remove the air from the bag, you’ll notice that the air is getting sucked out of the produce bag too. Before the machine can begin heat sealing, stop the process and pinch down on the twisted part of the bag. Carefully open the bag while maintaining your grip on the twisted part of the produce bag. Again, carefully insert the twist into the machine again and then allow it to heat seal. Presto! Free bags. Most importantly I would not use this for long-term storage over a month in the freezer. The bags are a bit too thin for that.