A Chamber Vacuum Sealer is top of the line
Much of the information that I mentioned in the Out of Chamber buyer’s guide applies here. I suggest you start there if you are new to vacuum sealers and are looking to learn. An Out of Chamber Vacuum Sealer will do what most people need rather nicely, however a Chamber Vacuum Sealer is without a doubt the gold standard in the vacuum sealer world. If you have an unlimited budget and or you like to spoil yourself, or if you will be vacuum sealing a lot, a Chamber Vacuum Sealer is for you.
In this article I will talk about the benefits and features of chamber vacuum sealers, features you can expect from them, considerations and maintenance for your chamber vacuum sealer and then finally, my suggestions for which model to pick.
Benefits to owning a Chamber Vacuum Sealer
There are numerous benefits that a chamber sealer has over an out of chamber sealer. Chamber sealers are built durably with heavy duty use in mind. It wouldn’t be shocking to find chamber vacuum sealers in a commercial setting. The ability to adjust the pull of the vacuum is a nice feature, not to mention the fact that a chamber vacuum sealer will be able to pull an overall much stronger vacuum than an out of chamber vacuum sealer.
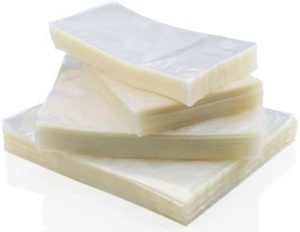
The biggest benefit to the chamber vacuum sealer is the ability to vacuum seal liquids and fine, powdery things. Yes, you can vacuum seal soup! And no, you don’t have to freeze it first. This is because the enclosed chamber in which you are placing the bag is evacuated of air, not just the bag itself. This equalizes the pressure on all sides of the bag which means the contents of the bag do not move. The other major bonus due to this characteristic of chamber vacuum sealers is that you don’t have to use textured bags. What does this mean for you? It means you are able to use much cheaper bags and rolls. If you intend to vacuum seal very often, saving on the bags and rolls alone will more than make up the cost difference between an out of chamber vacuum sealer and a chamber vacuum sealer.
More Benefits!
This is another big one: No worrying! You don’t have to concern yourself about liquids or powders getting into the pump. No watching out for liquids getting near the seal strip, causing bad seals. You will rarely if ever have to re-seal a bag that has been vacuum-sealed in a chamber vacuum sealer. In fact, once you put it in the bag and into the chamber, choose your settings and press the button you can walk away and do something else. Oh, and don’t let me forget to mention that they operate faster in general. You can use mylar bags, you will just need to increase the seal time.
Features common to a Chamber Vacuum Sealer
- Marinating without a separate accessory: Press the marinate button and it will typically remove the air, then re-pressurize in a cycle to best marinate food quickly.
- Heavy-duty, commercial quality: I mentioned this earlier, but it also means that you don’t need to wait for it to cool down to continue using it for consecutive seals. No rest periods!
- Awesome Seal Strips: The seal strips are more robust, thicker, and some machines even a double or triple seal bar.
- Accessory Ports: These are not as common on a Chamber Vacuum Sealer, but you can still find them on these types of machines.
- Strong Pumps: You will find two kinds of machines on the market. Dry pumps and lubricated pumps. The lubricated pumps use an oil like that of a hydraulic jack, making them quieter, with faster cycle times that allow them to run without excessive heat buildup. The drawback to the oil pump is that it will require oil changes, similar to a car. Sometimes the oil can have an odor (though if you choose this one, it shouldn’t be a problem).
Maintenance and serviceability of a Chamber Vacuum Sealer
Cleaning is easy. Since the surfaces are non-porous you just wipe it down with a sponge or towel. There are no drip trays or anything of the sort since they are not needed. You aren’t likely to make a mess inside of the machine as long as you are careful.
Since you are going to be spending a pretty penny on this appliance it would be wise to make sure it is serviceable. For this reason, I can’t in good faith recommend the PolyScience brand. There are no replacement parts available on their website, which surprises me since Breville (who owns PolyScience) sells replacement parts for Breville branded items on their site.
Comparatively, ARY VacMaster support is very good. Parts are not only available, but are also affordable and shipped fast. Their support team will give you instructions and guidance on how to install the parts, too.
Considerations before buying a Chamber Vacuum Sealer
With these machines you can’t just seal something, you have to complete an entire cycle. This means you can’t just re-seal a bag of chips or something similar.
These machines are HEAVY! You will want to leave them where you put them!
These machines are also BIG! You will want to make sure that where you put them is convenient to your work area, and that you have enough room. You won’t want to be moving it around a lot. They won’t stow away in drawers or cabinets very easily. Read the accessories section below for suggestions on dealing with the size and weight.
My Chamber Vacuum Sealer Suggestions
ARY VacMaster’s are the name when it comes to a chamber vacuum sealer. You won’t find any other brand that offers the same return for your dollar. The closest you’ll come in price is the PolyScience 300 Series, Though, the PolyScience will not be one of the sealers I suggest. You can’t buy parts for it.
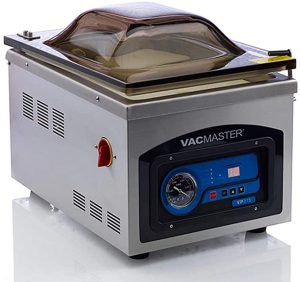
The best chamber vacuum sealer for your average at home cook is the ARY VacMaster VP112S.
If you are absolutely dead set on spoiling yourself and having the best of the best, then you should get the ARY VacMaster VP215.
ARY VacMaster VP112S details:

- 12″ removable Sealer bar with interior
- chamber dimensions of 12″ wide x 11″ deep x 5″ high
- Maximum bag size of 12″ x 14″
- Produces a vacuum at approximately -26 inHG
- 110V, 60Hz, 6 Amps. There is a 220-240V version available, Model # VP112SEU if you can find it.
- The VP112S does not have an accessory port. The VP112 does.
- Note: The VP112S and the VP112 are very nearly the same machines. Besides the accessory port, the key differences are that the lid and chamber have been re-engineered and weighs less. The control panel also looks different and is easier to use.
- This model is especially ideal for home kitchens due to the low profile design and the hinged lid that slides up and tucks towards the back. It is approximate ~12″ tall with the lid open.
- Weighs almost 50 lbs
- 16″ wide x 24″ deep x 9″ high overall dimensions
- 1 year limited warranty
- You can’t seal without going through a vacuum cycle
ARY VacMaster VP215 details:
- 1/4 HP oil lubricated pump, which is quieter than a dry pump.
- 10.25″ removable double seal bar (Two wires in the seal strip. Removable for easy replacement)
- chamber dimensions of 11.25″ wide x 15.25″ deep x 5″ high
- Weighs almost 90 lbs
- 14″ wide x 20″ deep x 15″ high overall dimensions
- Includes filler plates and maintenance kit
- Maximum bag size of 10″ x 13″
- 1 year limited warranty
- 110v 60Hz, 4 Amps. There is a 220-240V version available, Model # VP215EU if you can find it.
Accessories
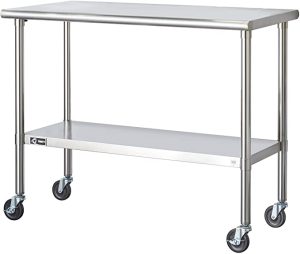
You may not have the desire or counter space to keep your chamber vacuum sealer, and due to the size and the weight, it isn’t practical to keep moving it around. Your solution? A kitchen cart! I actually had a somewhat difficult time finding a cart that would be suitable for such a heavy machine. I didn’t want to settle for one of those wire metal shelves on wheels. It is too hard to work on one of those, nothing balances right. I kept searching and found the perfect solid metal cart that measures 48″ x 24″. Click here to check it out. Each shelf can hold up to 150 lbs distributed evenly. Perfect!
Also, an Impulse sealer:
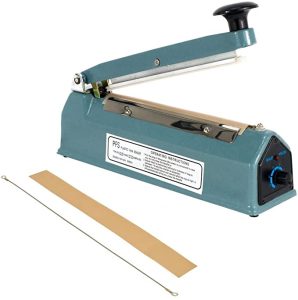
You may want to pick up an impulse sealer to compliment your chamber vacuum sealer. Since you can’t activate the seal strip without going through a full vacuum cycle, you can’t easily make bags from a roll. You can get around that with a cheap impulse sealer, which is a sort of portable version of the seal strip on the machine itself. You close the lever and it will melt the plastic together. You can also use it to add additional seals after you have vacuum sealed your items to help prevent failure.